Source: https://developers.woosmap.com/products/mobile/android/step-by-step-first-application/
> For clean Markdown of any page, append `.md` to the page URL.
> For a complete documentation index, see https://developers.woosmap.com/llms.txt
# Step by Step First Application
This guide will show you how to set up the Woosmap Android SDK and display a simple map.
This is a step-by-step guide that assume no previous knowledge of Android development.
## Creating your first Application
### Android Development Tools
To create our Android app we will need some environment configuration and tools.
Luckily everything can be done by just downloading and installing [Android Studio](https://developer.android.com/studio) on your machine.
If you leave all configuration by default it will prepare everything for you.
### Starting a new Project
Once started you will be welcomed by a first panel inviting you to create or open a project.
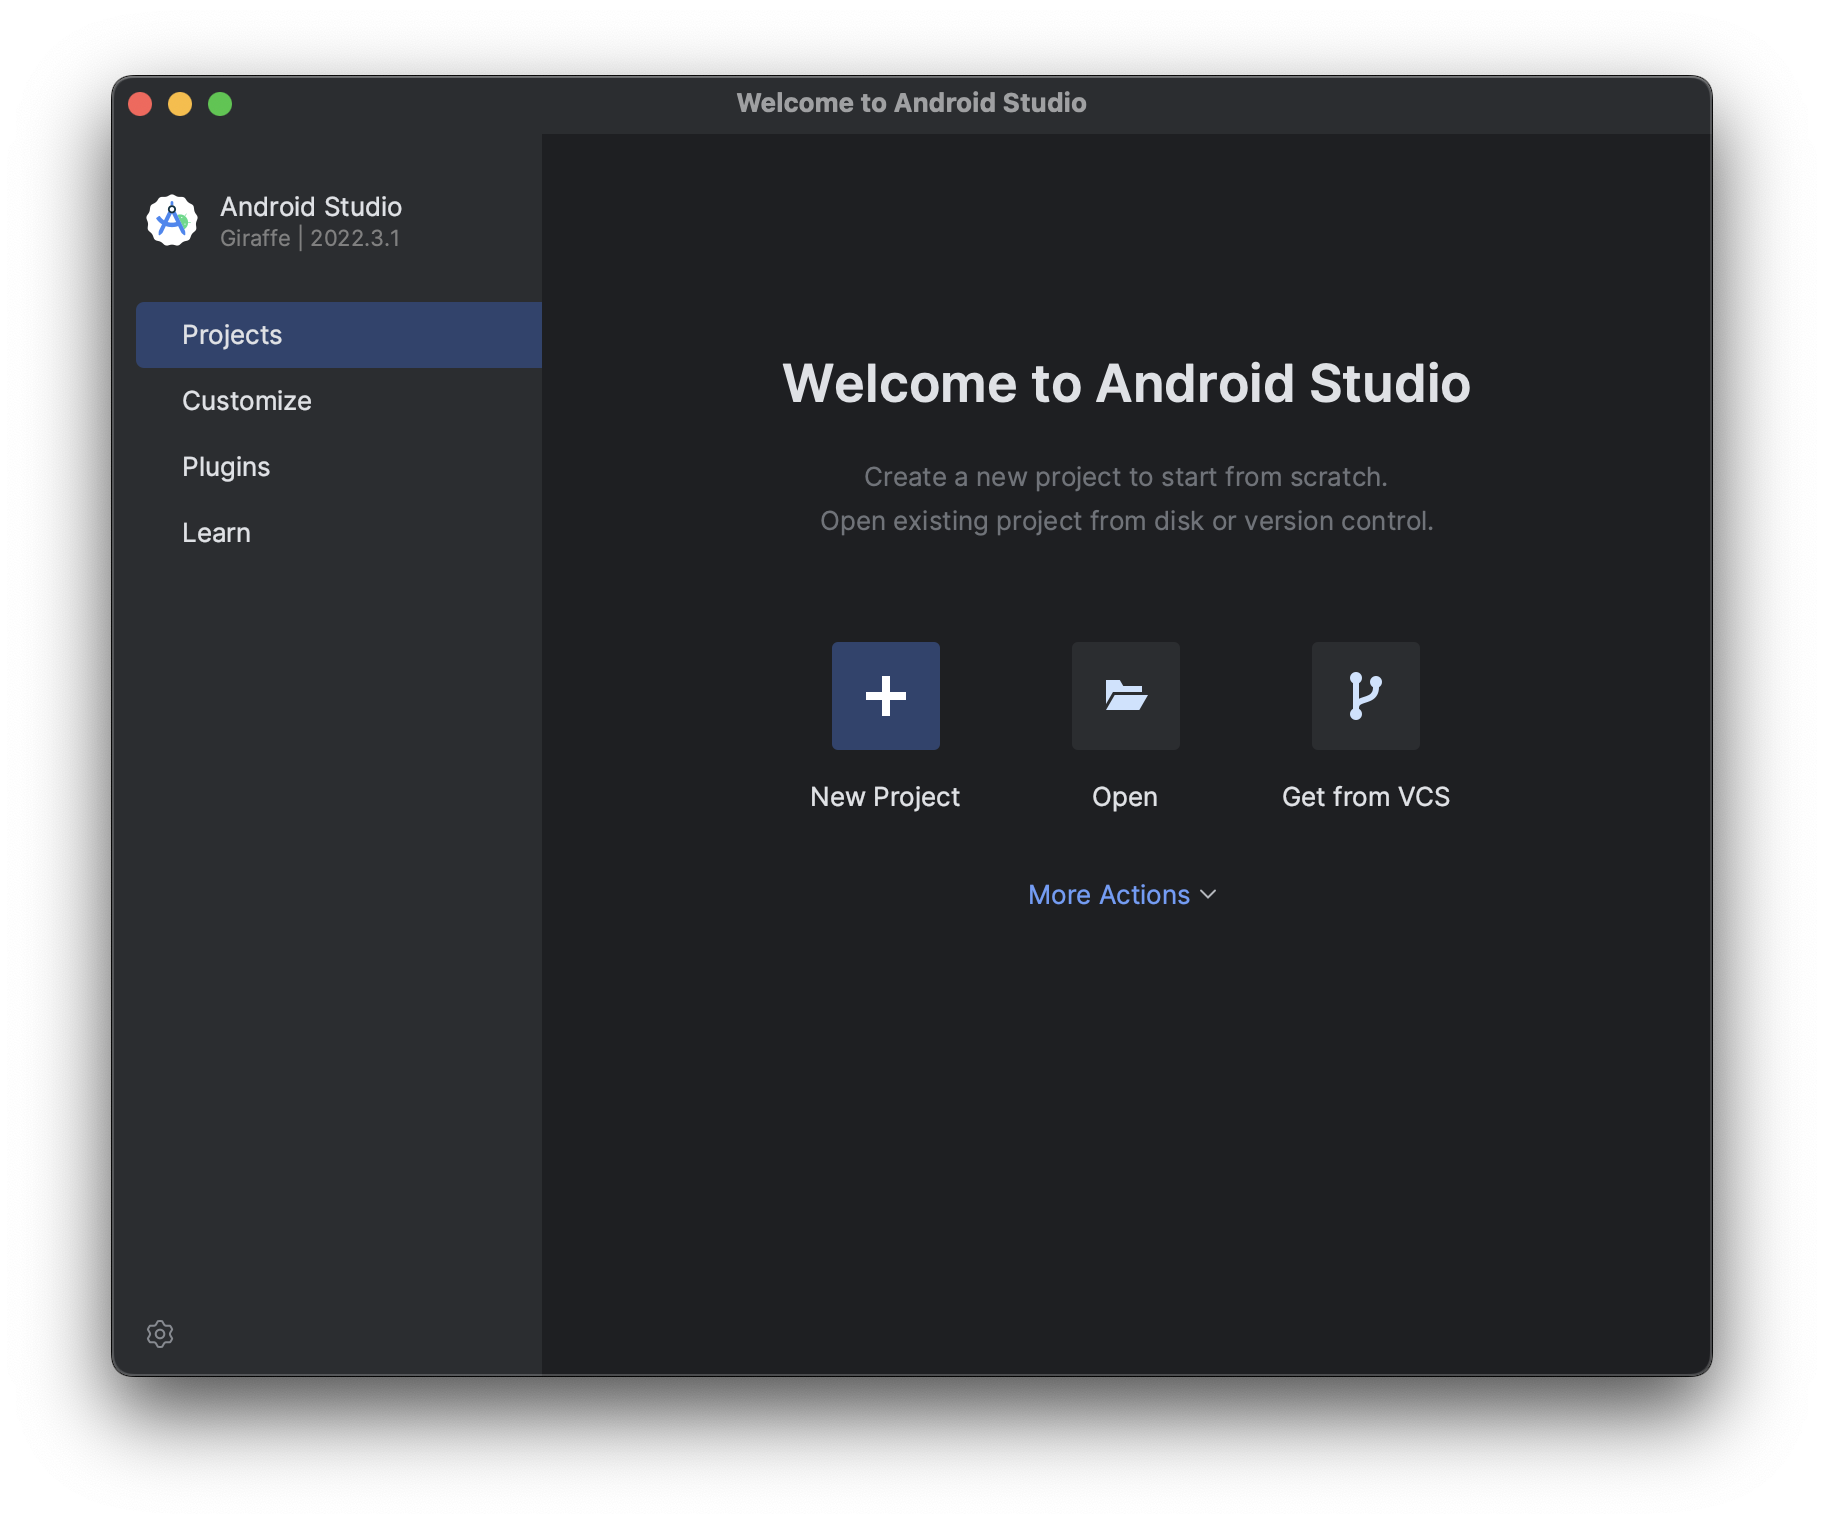
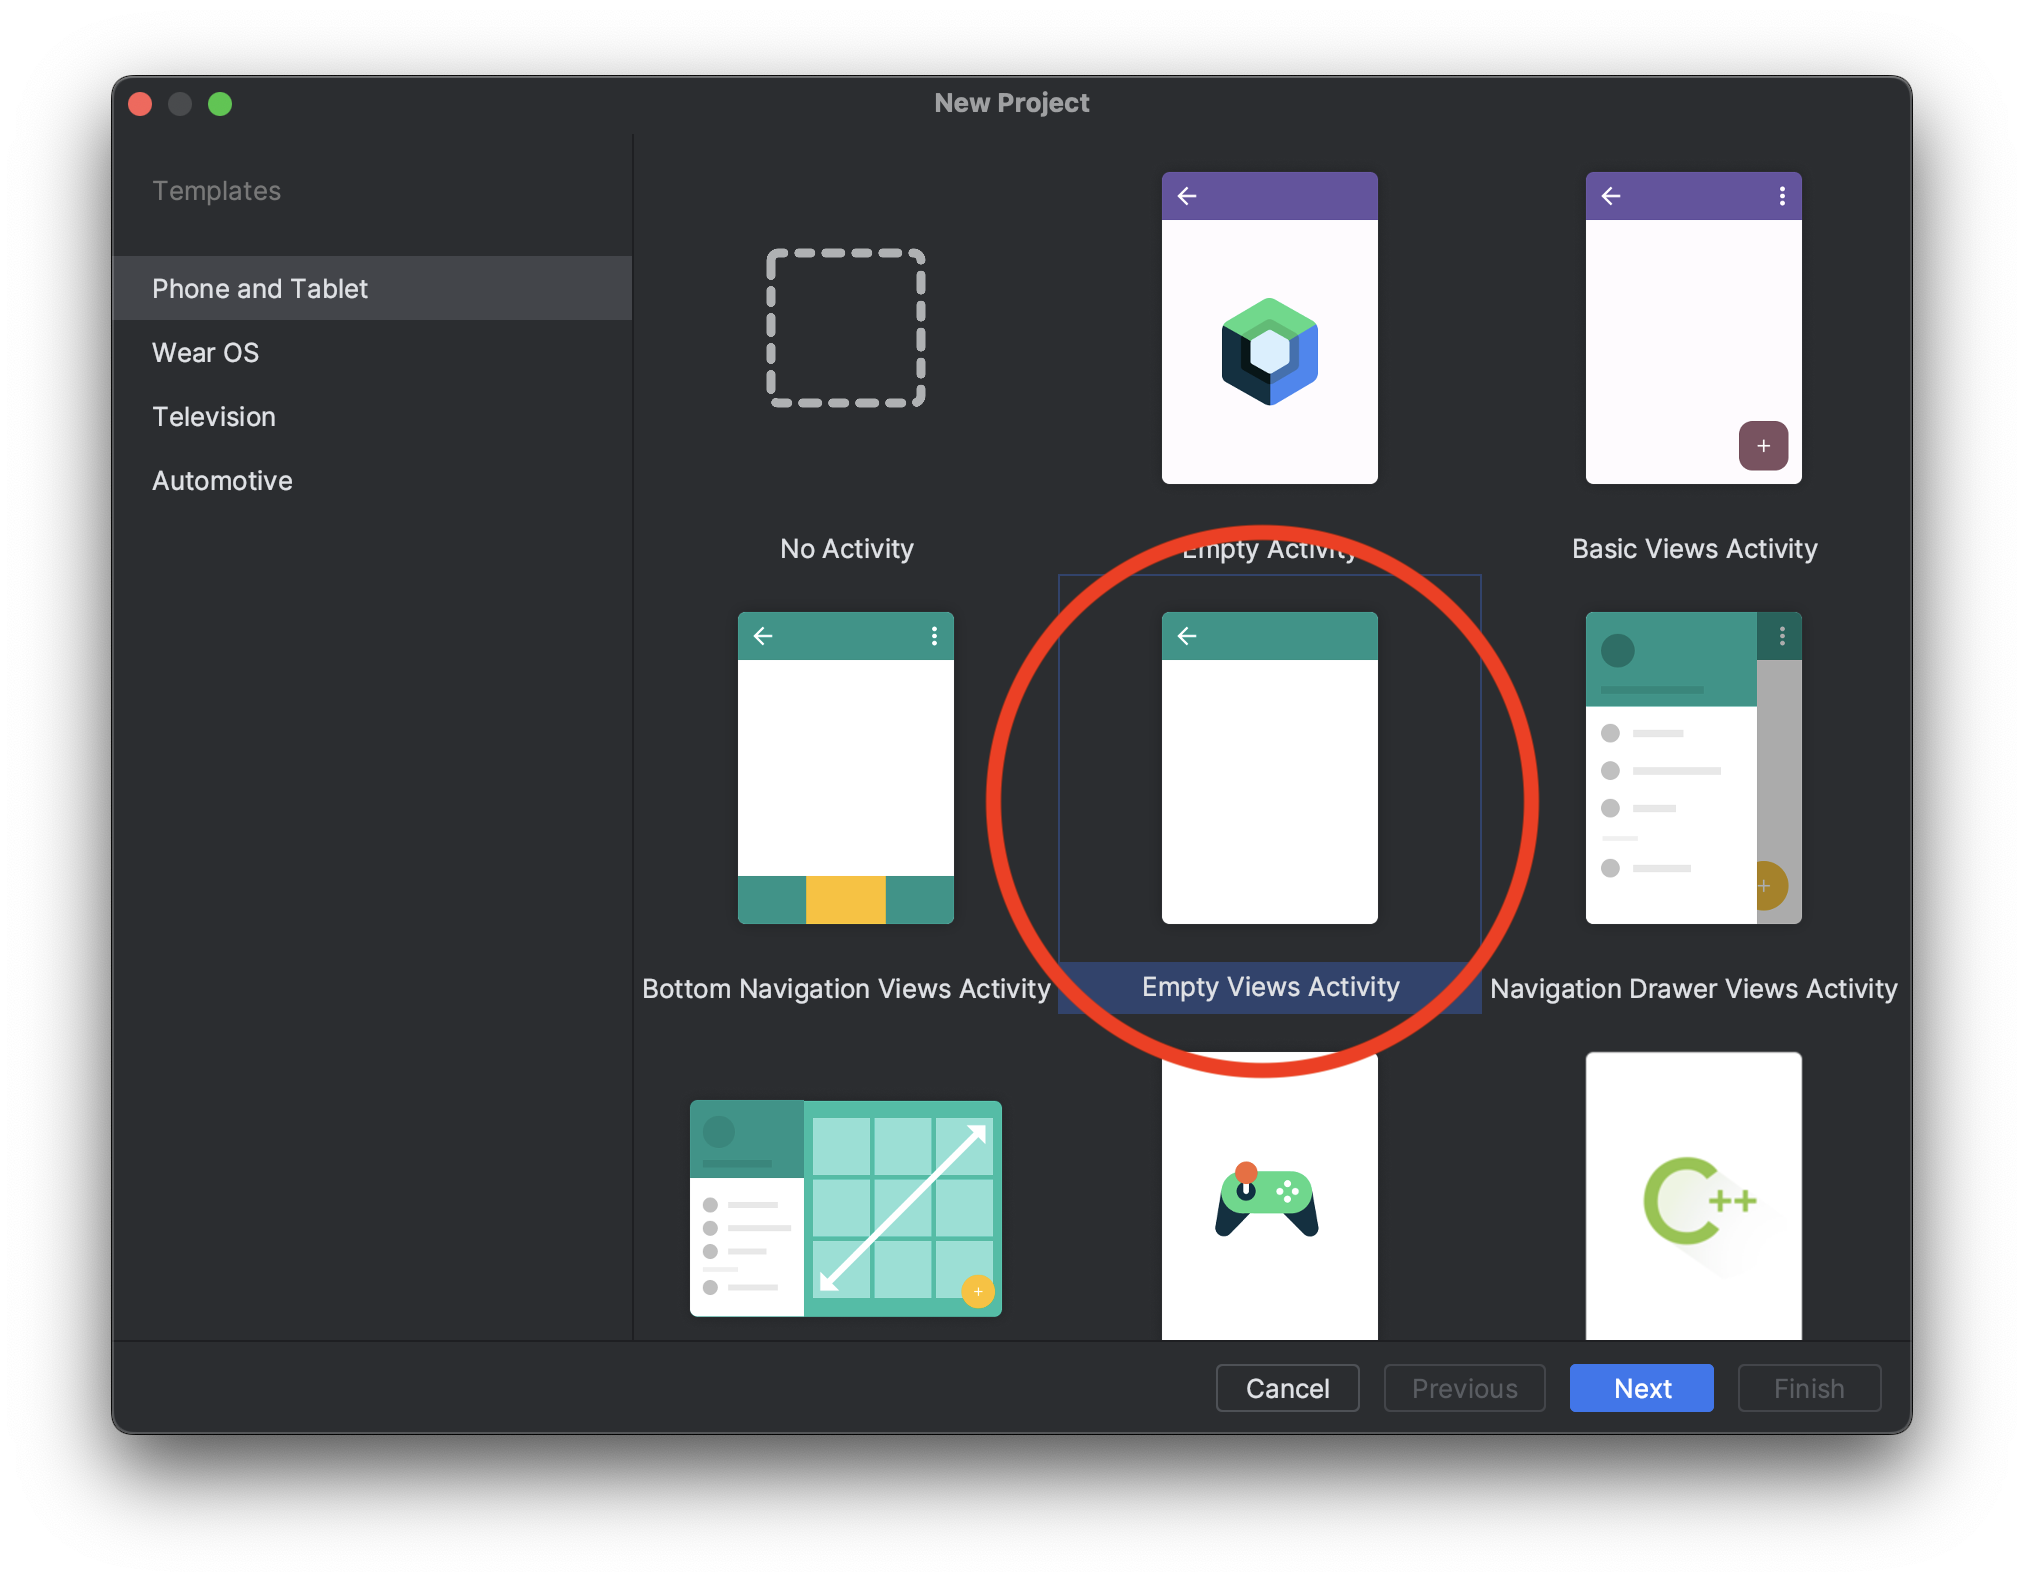
You can click a new project, it'll then ask you to pick a template: let's start with an `Empty Views Activity`.
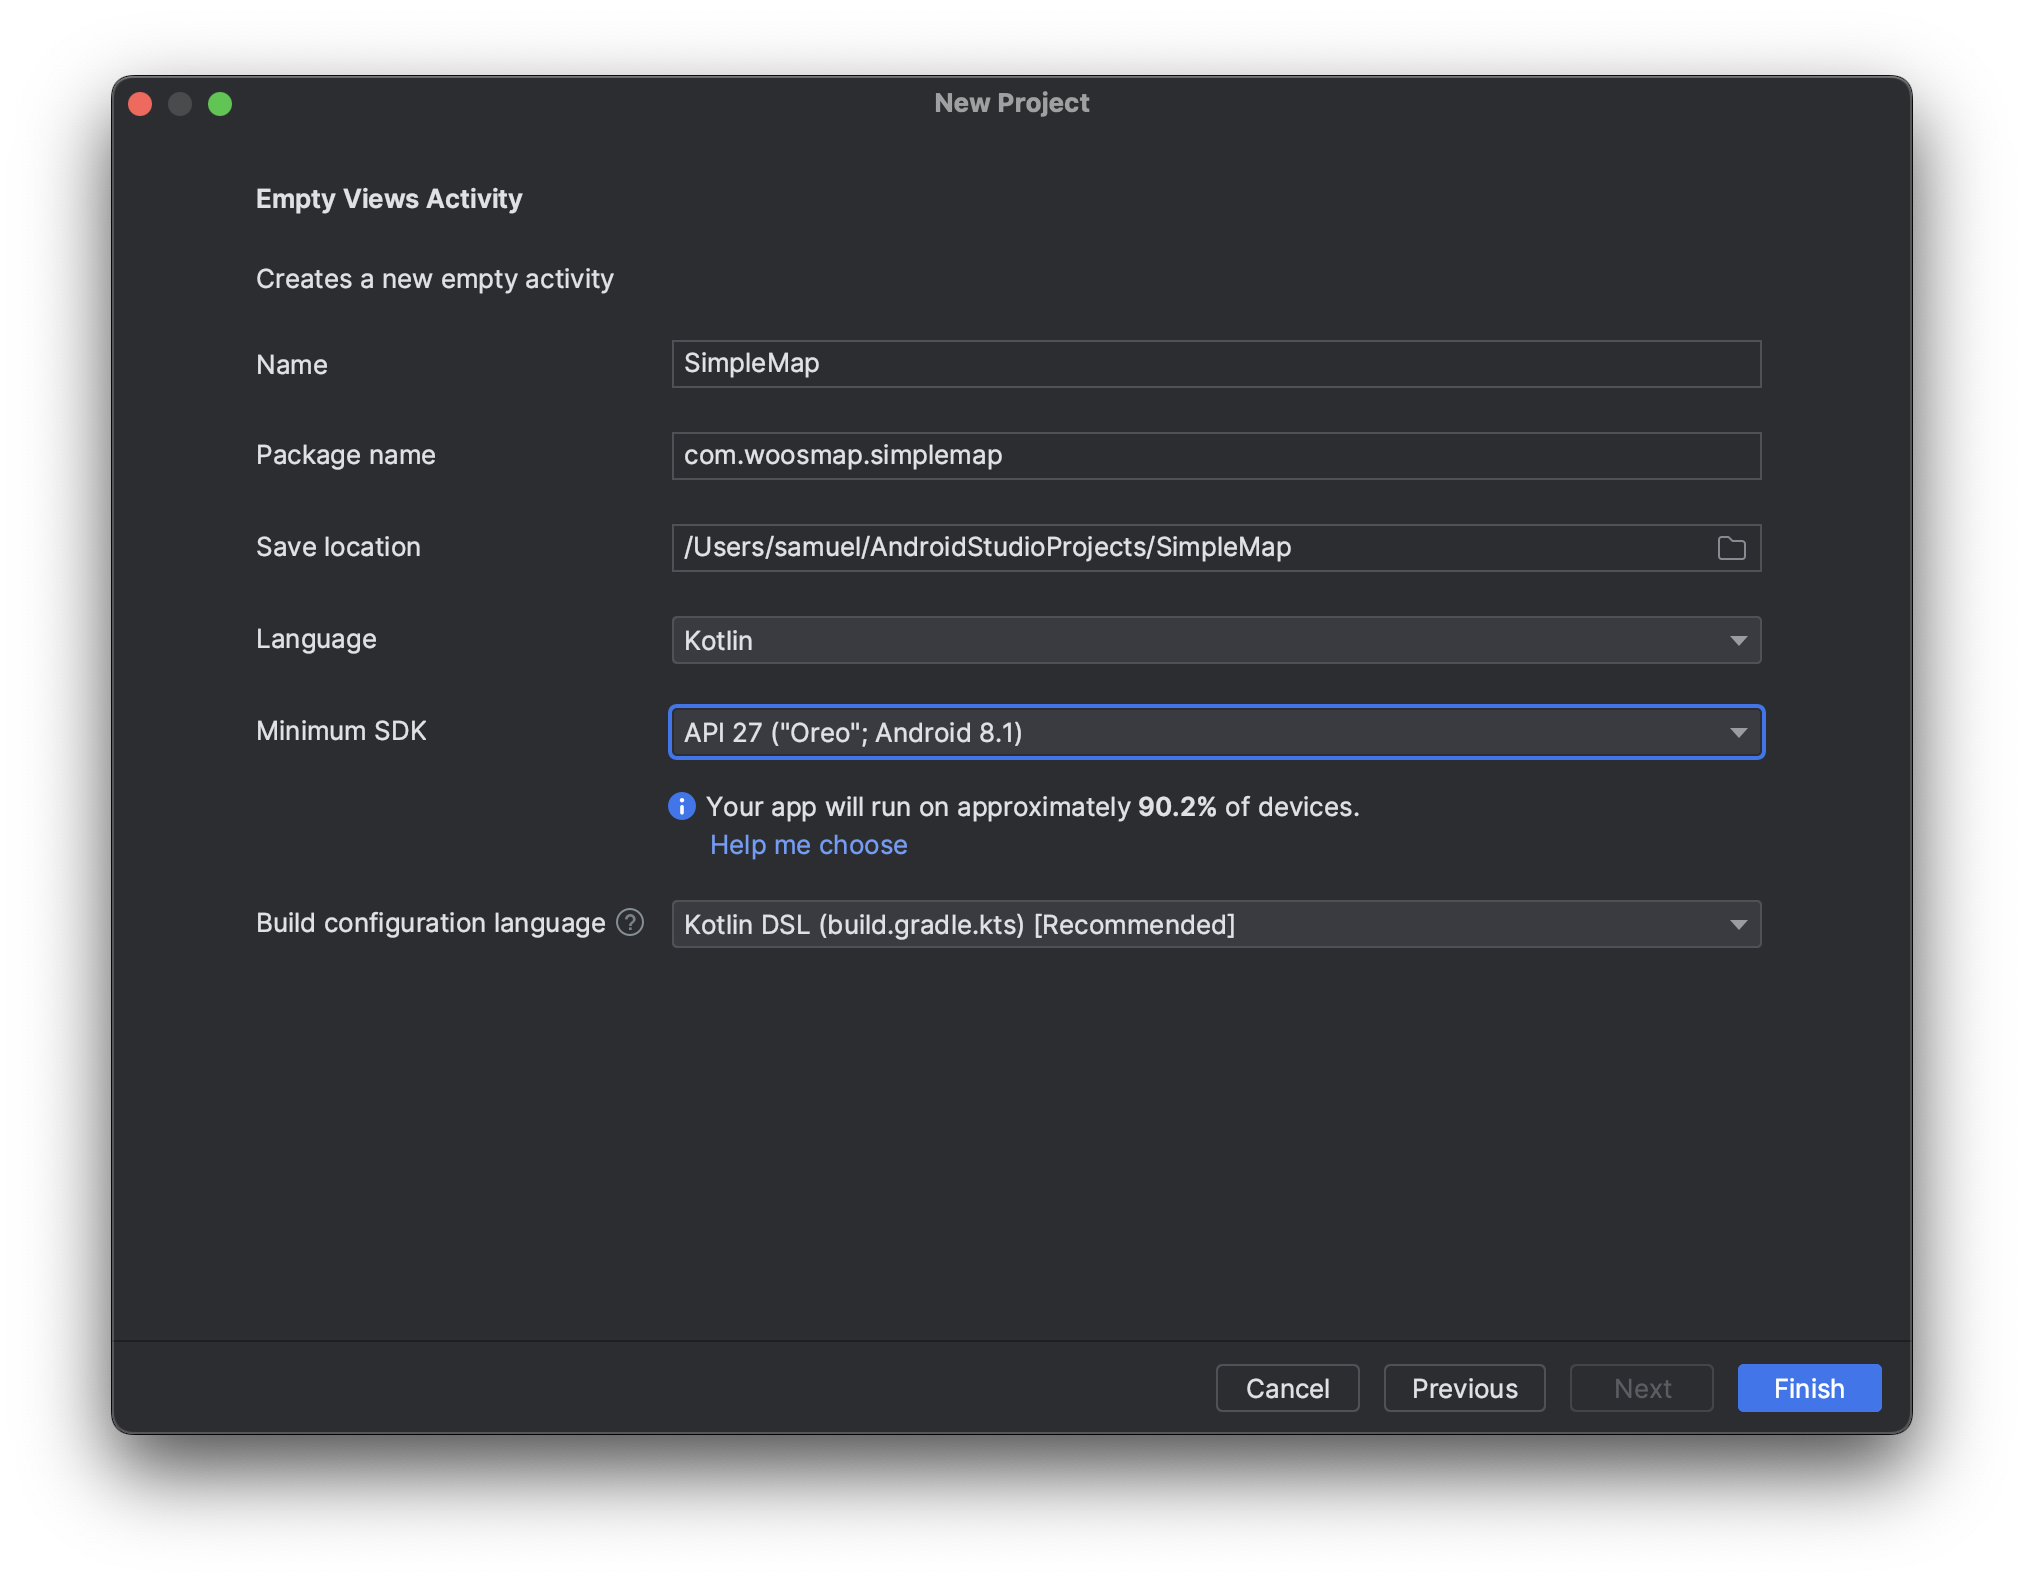
Now it's time to configure the basics of your project, give it a name as well as a package name.
We recommend to use **Kotlin** as a programming language but if you rather go with **Java** instead, no worries, this tutorial will provide you with both code samples.
The minimum SDK version is up to you, older version means that you might have to handle more ways to do the same thing for compatibility purpose but covers more existing phone that aren't updated.
Our SDK can be used with Android API 21 and above (Android 5.0 Lollipop).
**Android API Version** and **Android Platform Versions** are different. You can find more information and a compatibility list [here](https://developer.android.com/guide/topics/manifest/uses-sdk-element#ApiLevels)
When it comes to the `Build Configuration Language` we highly recommend to keep `Kotlin DSL`.
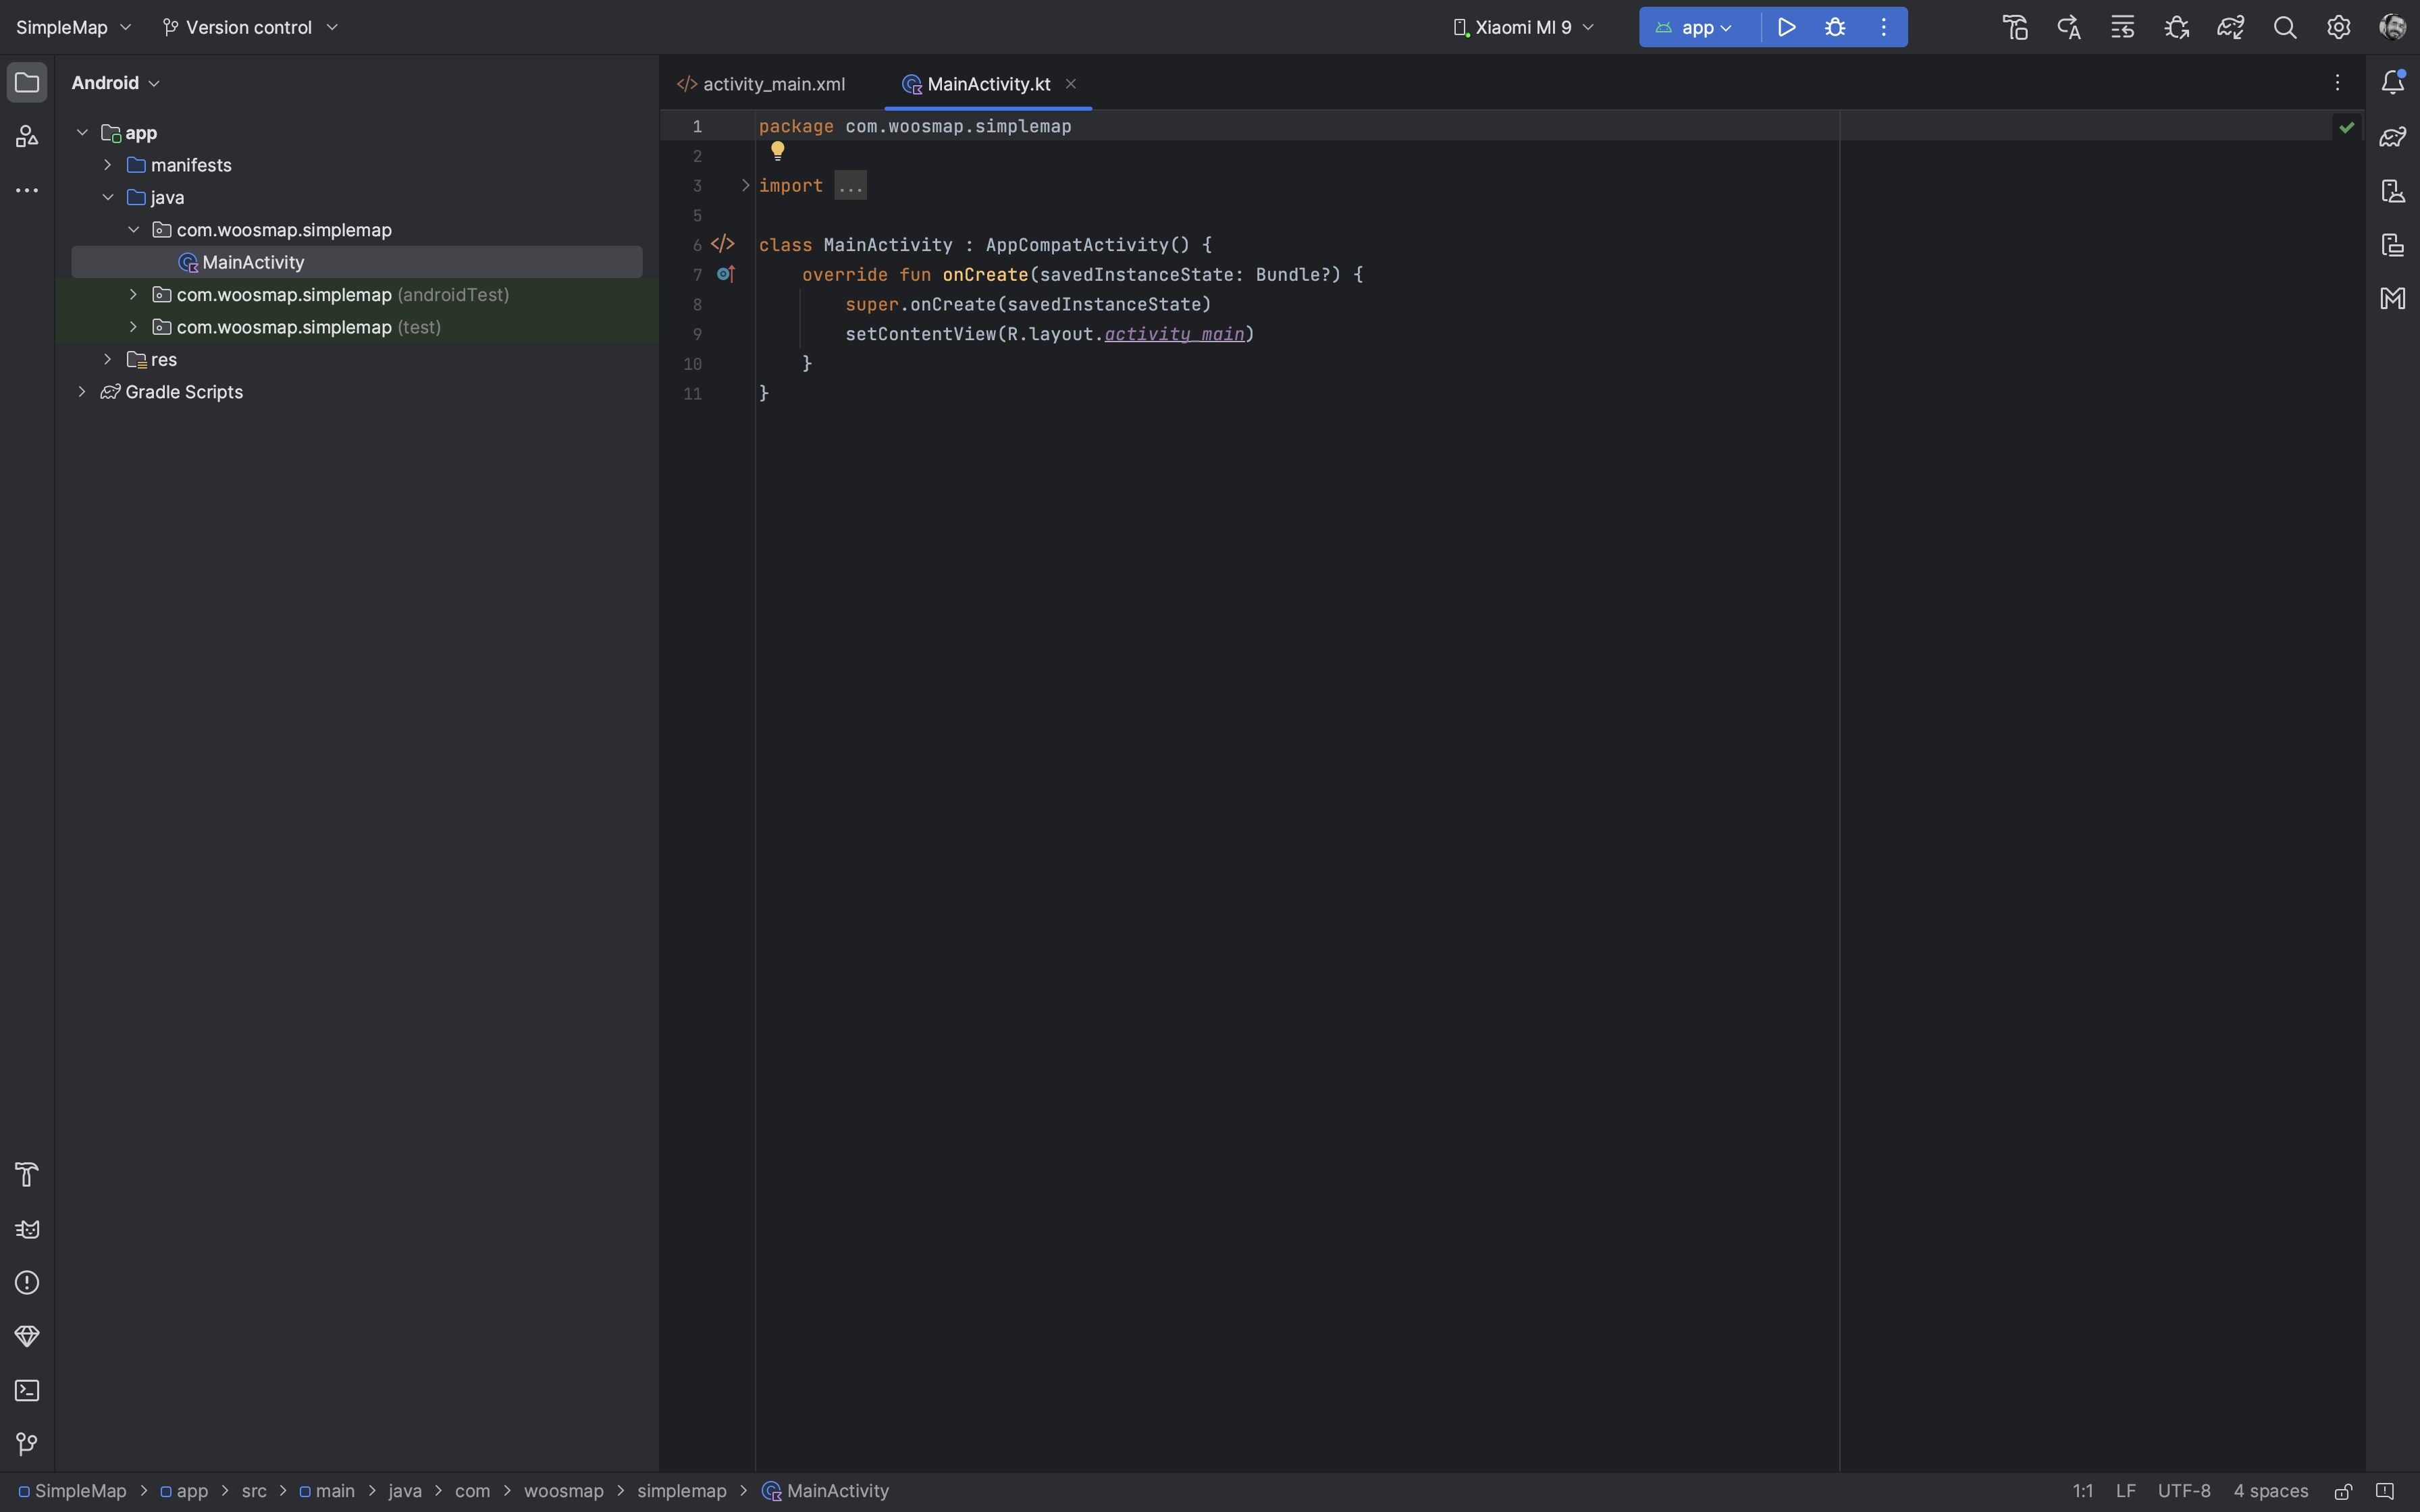
Once done Android Studio will create all the files for your project and start indexing and downloading the template's dependencies.
It might take a little time depending on your disk and network speed.
Eventually you will see something very similar to the next image.
### Configuring the project to use Woosmap Android SDK
Before we start we'll need to talk about **Gradle** if you are already familiar with it, you can skip the next part.
#### Gradle
Android projects are configured and built by a tool named [Gradle](https://gradle.org/).
It fulfills a similar role that you might have encountered using tools like **Make**, **NPM**, etc...
However, Gradle gets configured mostly by code and this code-configuration highly depends on which plugins are activated.
In our case the biggest one is the **Android Gradle Plugin** also known as **AGP**.
By using Android Studio's template our project comes with a set of files already all preconfigured, including **AGP**,
which will allow us to build a simple application.
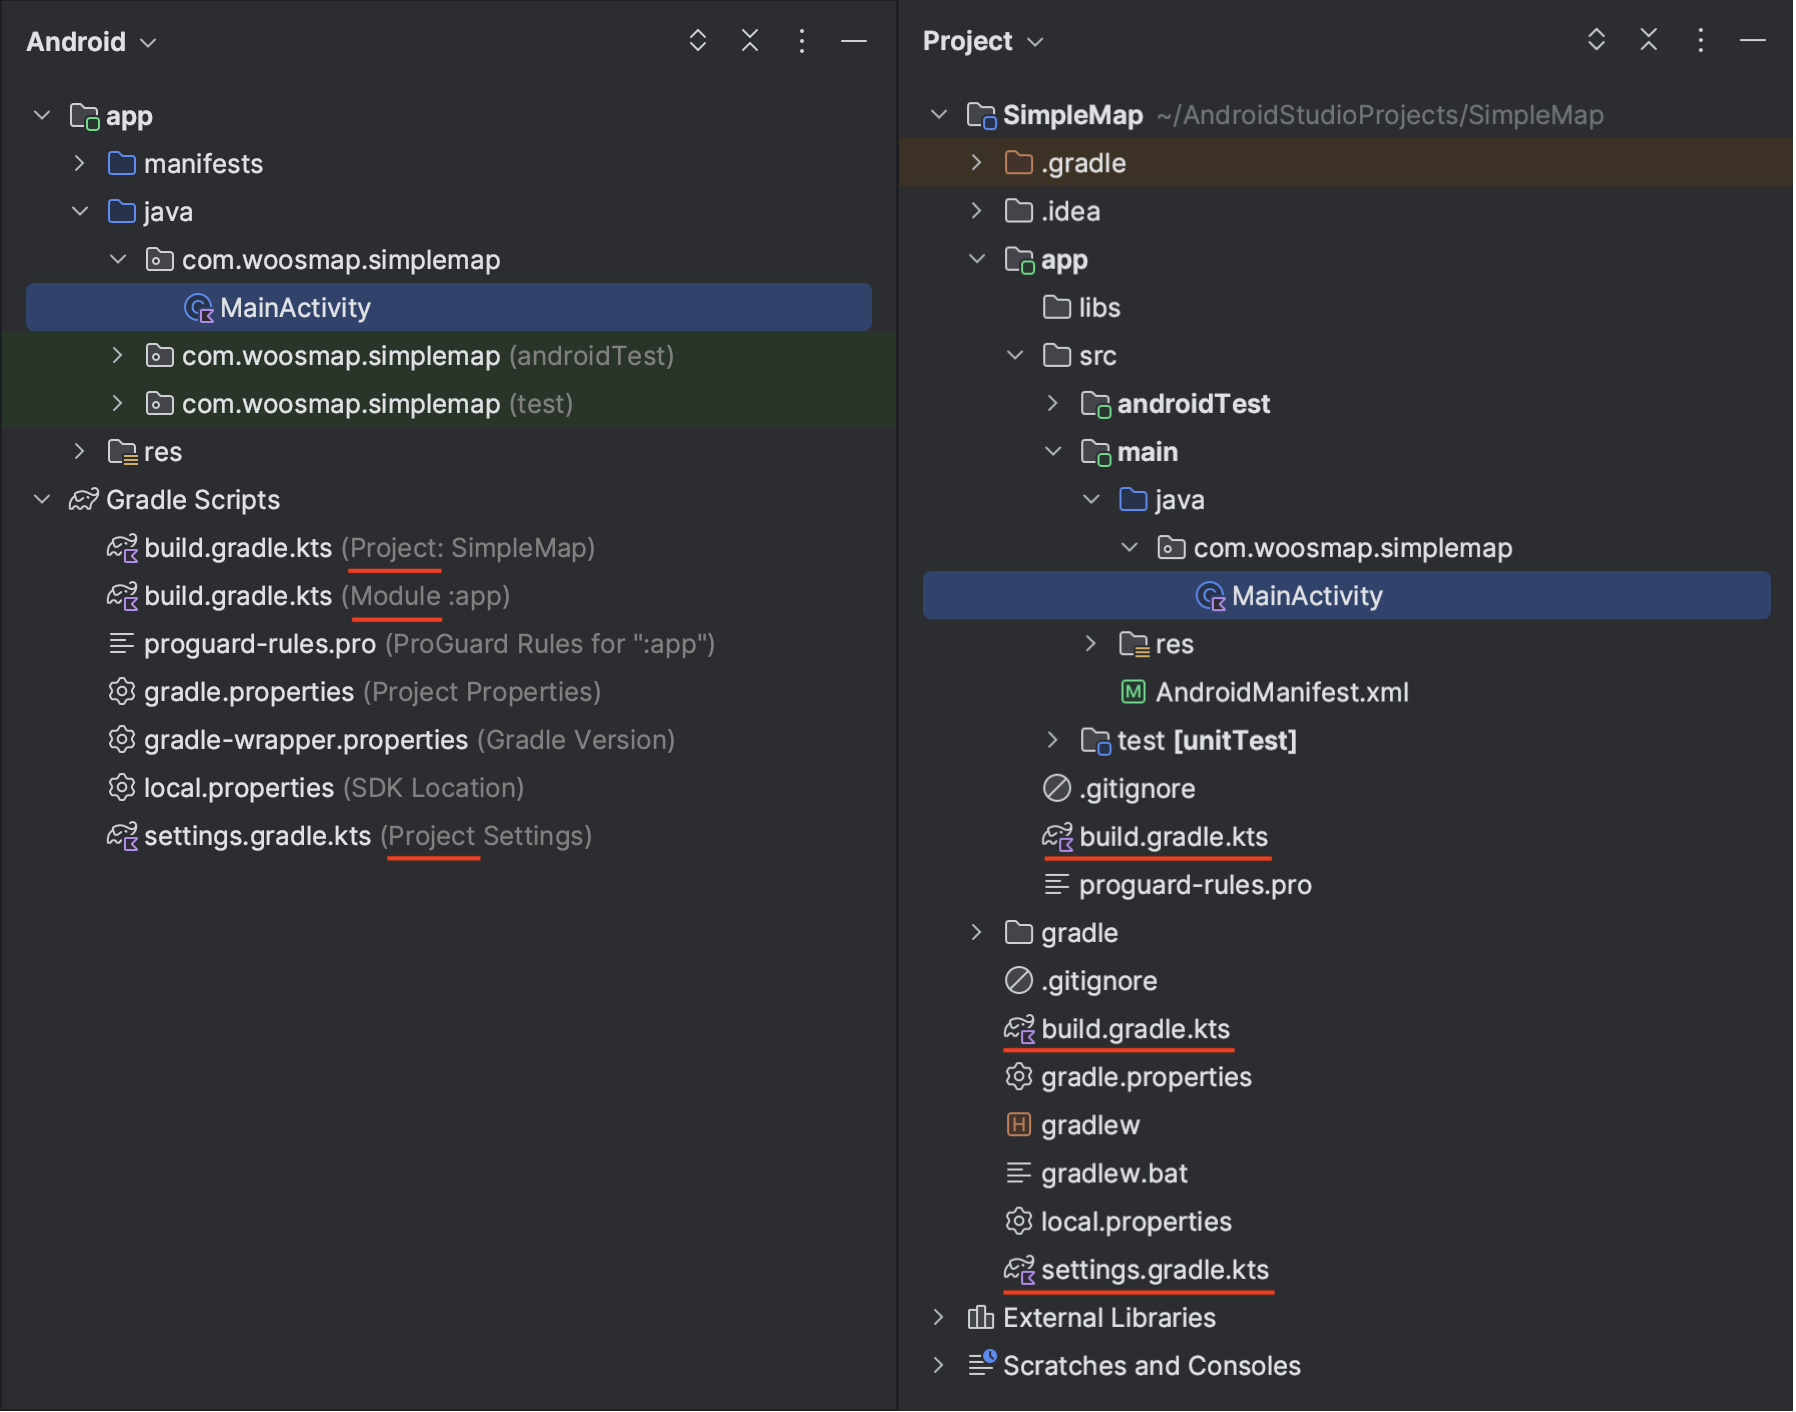
It's important to note the structure of Gradle's files:
- **Project (or root) level files**: You will find one `settings.gradle.kts` and one `build.gradle.kts` at the root of your Project directory
- **Module level file**: one `build.gradle.kts` file is in your app directory
Android Studio has an `Android View` and a `Project View`.
The former is the default and tends to help focus while developing, the latter is a representation of how the files are laid out on disk.
We strongly recommend to use **Kotlin** for Gradle scripts. Luckily since Android Studio 2022.3.1 it's the default but
if you are on an existing project and want to learn how and why make the switch follow this [guide](/products/mobile/android/gradle-kotlin/).
#### Adding Woosmap Android SDK to the project dependencies
Add our repository in your configuration in order for Gradle to be able to download the SDK as a dependency.
At the root of your project in your `settings.gradle.kts` add the following :
```kotlin
dependencyResolutionManagement {
repositoriesMode.set(RepositoriesMode.FAIL_ON_PROJECT_REPOS)
repositories {
google()
mavenCentral()
maven {
url = uri("https://native-sdk.woosmap.com/android/")
}
}
}
```
```groovy
dependencyResolutionManagement {
repositoriesMode.set(RepositoriesMode.FAIL_ON_PROJECT_REPOS)
repositories {
google()
mavenCentral()
maven {
url "https://native-sdk.woosmap.com/android/"
}
}
}
```
Then you can add the dependency to our SDK in your gradle's `build.gradle.kts` module-level file
```kotlin
dependencies {
//...
implementation("com.woosmap:sdk:0.9.0")
//...
}
```
```groovy
dependencies {
//...
implementation "com.woosmap:sdk:0.9.0"
//...
}
```
### Create your API Key
In order to use our service from a mobile, you will need to create a Private API Key with the proper restriction in the console.
If you don't know how, you can follow the directions specified in the [API Key documentation](/api-reference/authentication/#registering-a-woosmap-private-api-key)
You will need to provide two information from your application to create the API Key:
- **Package ID**: this is the application ID you set during configuration in our example it's `com.woosmap.simplemap`
- **Fingerprint**: this is the SHA-1 fingerprint of your certificate, an easy way to find it is to run `./gradlew signingReport` or you can find it in the Gradle tool window (by default on the right toolbar) under `app > Tasks > android > signingReport`
### Configure your API Key
In order to authenticate your application you will need to add a meta-data information to specify
your private key in the AndroidManifest.xml in your application's tag like so:
```xml
```
The SDK automatically sends the `X-Api-Key`, `X-Android-Identifier`, and `X-Android-Fingerprint` headers with every API request. If you're calling Woosmap REST APIs directly without the SDK, you'll need to set these headers yourself. See [Authenticating from Mobile Apps](/api-reference/authentication/#authenticating-from-mobile-apps-or-server-side-via-headers) for details.
## Adding a Map View
Open your `res/layout/activity_main.xml` and make sure to switch into `code` view.
The default view contains only a `TextView` setup to take the whole application screen, we're going to replace it with a `MapView` instead.
```xml
```
```xml
```
In your activity's code you can then obtain and manipulate the `MapView`.
```kotlin
import androidx.appcompat.app.AppCompatActivity
import android.os.Bundle
import com.woosmap.sdk.MapView
import com.woosmap.sdk.geometry.LatLng
class MainActivity : AppCompatActivity() {
private lateinit var mapView: MapView
override fun onCreate(savedInstanceState: Bundle?) {
super.onCreate(savedInstanceState)
setContentView(R.layout.activity_main)
mapView = findViewById(R.id.mapView)
mapView.zoomLevel = 3.0
mapView.center = LatLng(47.7724413, 12.4833043)
}
}
```
```java
import androidx.appcompat.app.AppCompatActivity;
import com.woosmap.sdk.MapView;
import com.woosmap.sdk.geometry.LatLng;
import android.os.Bundle;
public class MainActivity extends AppCompatActivity {
private MapView MapView;
@Override
protected void onCreate(Bundle savedInstanceState) {
super.onCreate(savedInstanceState);
setContentView(R.layout.activity_main);
MapView = findViewById(R.id.mapView);
MapView.setZoomLevel(3);
MapView.setCenter(new LatLng(47.7724413, 12.4833043));
}
}
```
You're all set, you can start the application on your phone or the emulator and should see something like the picture below.
- [Android SDK API Reference Documentation](https://native-sdk.woosmap.com/android/doc/latest/)
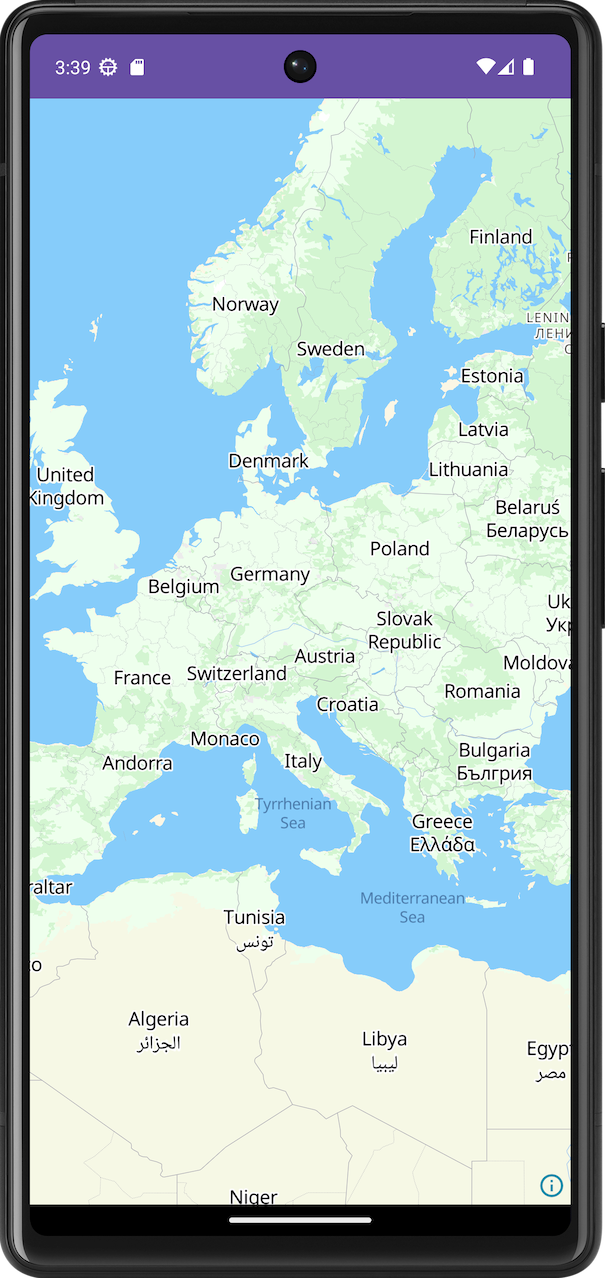{:style="display:block; margin-left:auto; margin-right:auto; width: 300px;"}