Display your Stores with the Android SDK
Using Stores with the Android SDK
This guide will show you how you can display your stores on a MapView.
This guide assume you already know how to add the SDK as a dependency and configure an API Key.
If you never used Woosmap Android SDK before, we strongly recommend to start with the Step by Step Guide first.
Adding a StoresRenderer
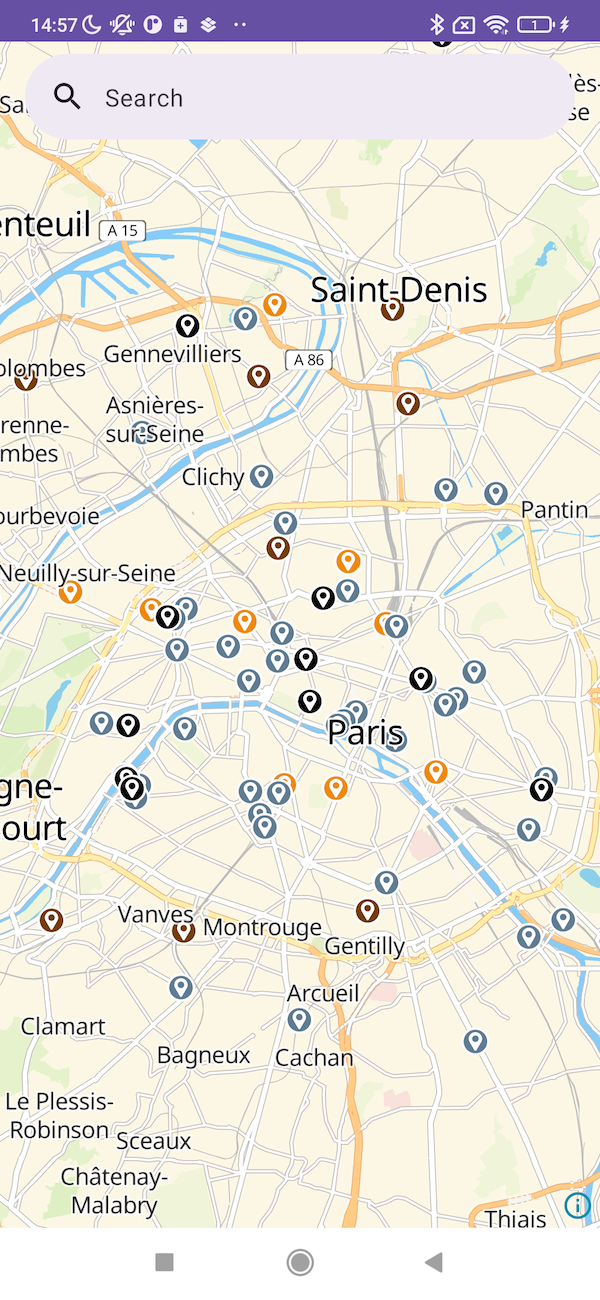
Similarly to its JavaScript counterpart and to ensure maximum readability and navigation, your data are displayed combining tiled images and markers. Tiled images are useful to render large amount of assets or high store density. This view makes the map displayed faster and provide a clean view. Markers are relevant to render branded pictogram after a specified level of zoom (breakpoint).
To display your stores you need to instantiate a new StoresRenderer which requires to have a StoresStyle ready first.
It’s possible to build a style programmatically but for your convenience you can just instantiate one reusing the same JSON definition than the one used in JavaScript.
            fun setupStoresRenderer() {
        val myStyle: String = """
        {
            rules: [
                //...
            ],
            default: {
                //...
            },
            breakpoint: 8
        }
        """
        val storesStyle = StoresStyle.buildFromJson(myStyle)
        val storesRenderer = StoresRenderer(mapView, storesStyle)
    }
The variable myStyle has been hardcoded in this example, but you can load it from your app bundle.
Store Symbols

Store Markers
Store Selection
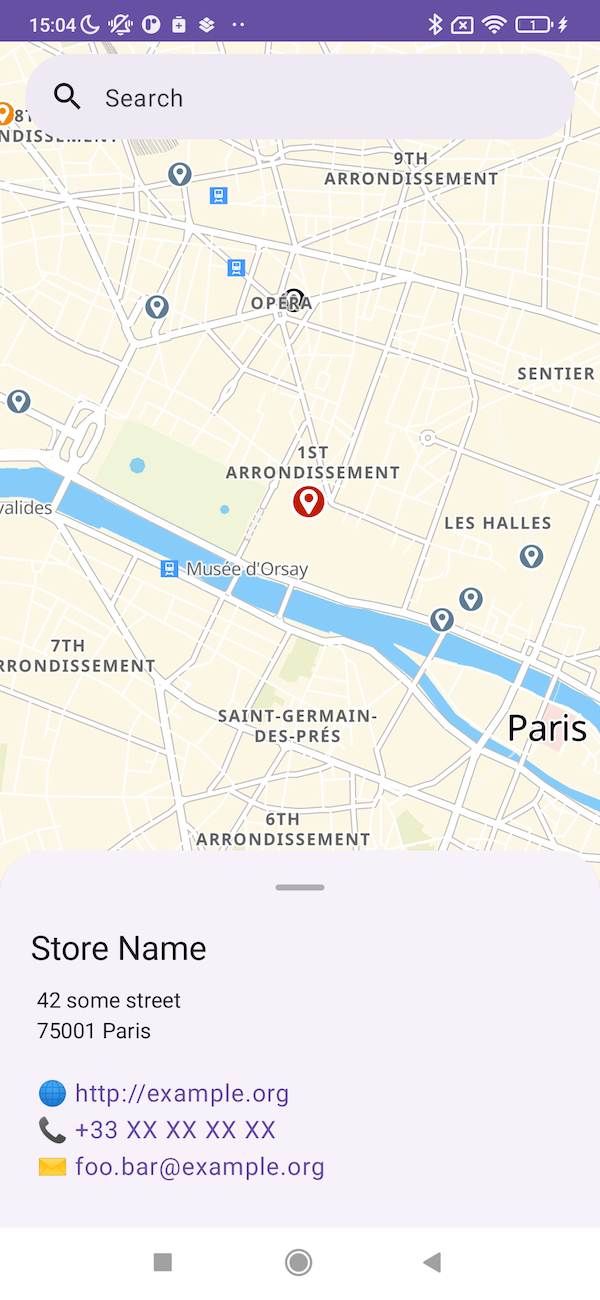
The StoresRenderer listen for user’s input and provide a callback if a store gets selected.
        class SomeClass {
    //...

    fun setupStoresRenderer(myStyle: String) {
        val storesStyle = StoresStyle.buildFromJson(myStyle)
        val storesRenderer = StoresRenderer(mapView, storesStyle)
        storesRenderer.addOnStoreSelect(::onStoreSelected)
    }

    fun onStoreSelected(selectedStore: AssetFeatureResponse) {
        selectedStore.properties.name?.let { println(it) }
    }
}
Your callback will be called with the result of a call to get all the details of your store. You will have access to all properties set on your store and be able to display them anyway you like.
Store Search
We also provide a StoresAutocompleteTextView if you wish to provide a simple widget for your users to search and select a store.
It’s built upon Android’s AutocompletTextView and can be used with UI designed by the Layout Builder. You only need to edit your layout XML to include it like so:
        <com.woosmap.sdk.StoresAutocompleteTextView
        android:id="@+id/autoComplete"
        android:layout_width="match_parent"
        android:layout_height="wrap_content"
        android:hint="Search Localities"
        android:selectAllOnFocus="true"
        />
        <?xml version="1.0" encoding="utf-8"?>
<androidx.constraintlayout.widget.ConstraintLayout xmlns:android="http://schemas.android.com/apk/res/android"
    xmlns:app="http://schemas.android.com/apk/res-auto"
    xmlns:tools="http://schemas.android.com/tools"
    android:layout_width="match_parent"
    android:layout_height="match_parent"
    tools:context=".MainActivity">

    <com.woosmap.sdk.StoresAutocompleteTextView
        android:id="@+id/autoComplete"
        android:layout_width="match_parent"
        android:layout_height="wrap_content"
        android:hint="Search Localities"
        android:selectAllOnFocus="true"
        android:padding="10dp"
        app:layout_constraintTop_toTopOf="parent"
        app:layout_constraintEnd_toEndOf="parent"
        app:layout_constraintStart_toStartOf="parent"
        app:layout_constraintBottom_toTopOf="@id/mapView"
        />

    <com.woosmap.sdk.MapView
        android:id="@+id/mapView"
        android:layout_width="0dp"
        android:layout_height="0dp"
        app:layout_constraintBottom_toBottomOf="parent"
        app:layout_constraintEnd_toEndOf="parent"
        app:layout_constraintStart_toStartOf="parent"
        app:layout_constraintTop_toBottomOf="@id/autoComplete" />

</androidx.constraintlayout.widget.ConstraintLayout>
Once the StoresAutocompleteTextView is configured in your layout you can use it in your view’s code:
        class MainActivity : AppCompatActivity() {

    private lateinit var mapView: MapView
    private lateinit var autoComplete: StoresAutocompleteTextView

    override fun onCreate(savedInstanceState: Bundle?) {
        super.onCreate(savedInstanceState)
        setContentView(R.layout.activity_main)

        mapView = findViewById(R.id.mapView)

        autoComplete = findViewById(R.id.autoComplete)
        autoComplete.onStoreSelected = { selectedStore ->
            mapView.requestFocus()
            storesRenderer.select(selectedStore)

            selectedStore.geometry.coordinates?.let { lnglat ->
                mapView.easeCamera(
                    CameraUpdate(
                        target = LatLng(longitude = lnglat[0], latitude = lnglat[1]),
                        zoom = 14.0
                    )
                )
            }

        }
        autoComplete.setOnDismissListener { mapView.requestFocus() }
    }
}